An information icon is a method to relay important dashboard information to the user. The information is relayed when the user hovers over the icon. This document explains how to create an information icon. You first need to download the image(s) you wish to use from the USI website and add them to your Tableau Repository. (See Adding Images to Your Custom Shape Folder)
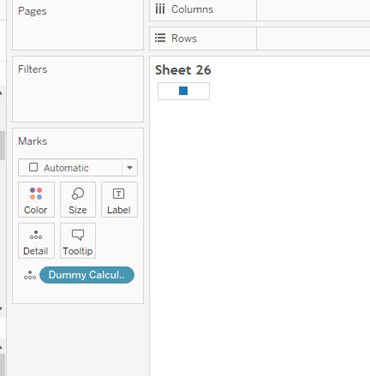
- Create a new blank worksheet.
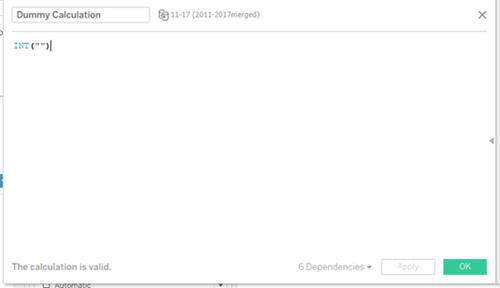
- Then create a dummy calculation.
- Place the dummy calculation onto the Detail pane.
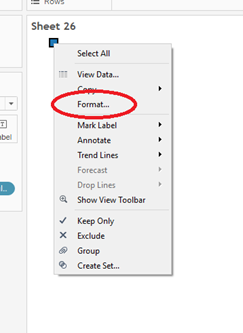
- Right click on the square in the view and select Format.
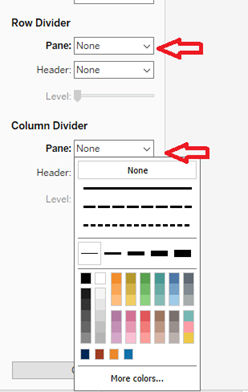
- Remove the row and column dividers.
- In the Marks card, select Shape from the drop-down list.
- Click on the Shape mark and then select More Shapes.

- In the Edit Shape dialog box, select Custom from the Select Shape Palette drop-down box.
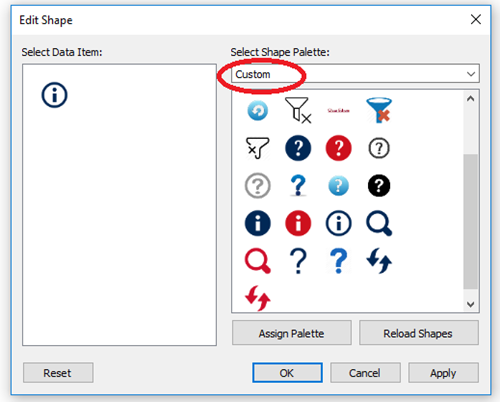
- Select the information icon and click OK.
- Adjust the size of the icon using the Size

- Click on the Tooltip mark.
- In the Edit Tooltip dialog box, remove the dummy calculation text and add the information you would like the user to know.
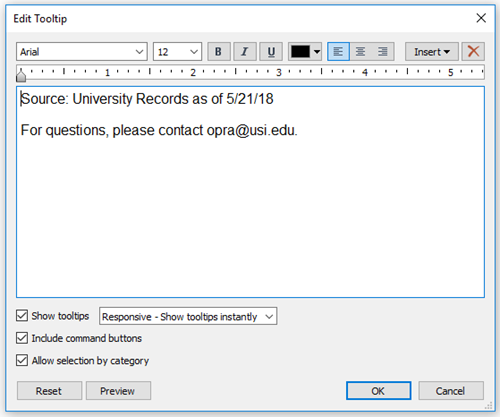
- Use Arial as the font and format the tooltip to make it easily read by the user. Click OK when done.
- Your information now should be visible as you hover over your icon.

- Save the worksheet.
- Navigate to your dashboard and locate the new information icon worksheet in you Sheets list.
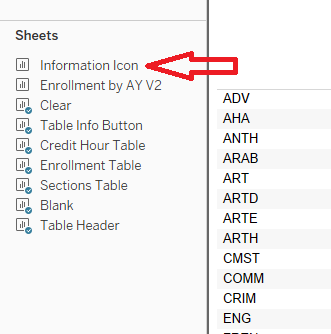
- Drag and drop the information icon onto your dashboard.
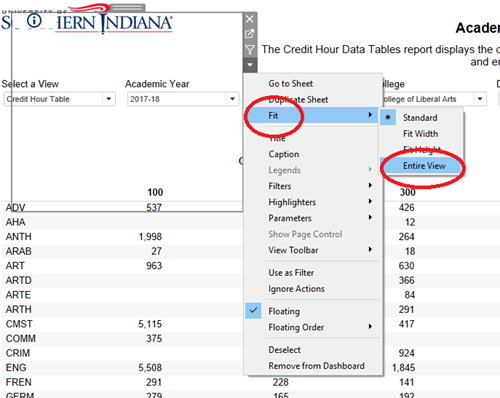
- Click on the More Options arrow and unselect Title.
- Click on the More Options arrow again and select Floating. This will give you a little more freedom in where you can place your icon.
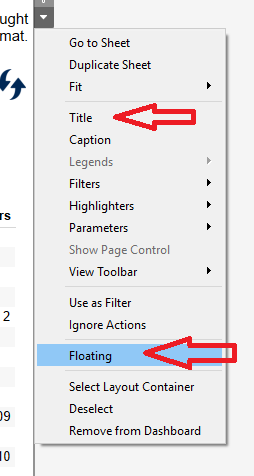
- Click on the More Options arrow again and select Fit, then Entire View.
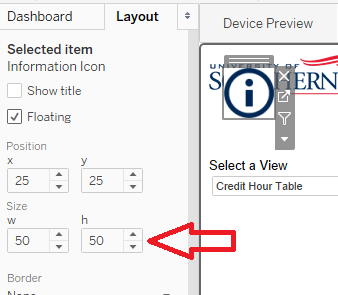
- Adjust the size of the icon. You can use your cursor to make the icon smaller, but you will also need to go to the Layout tab to make sure the icon is a square.
- In the Layout tab, change the w (width) and h (height) values to be the same. 50 is a good size setting.
- Now you can use your cursor to reposition your icon in a place where your user will see it. Somewhere in the top and upper right is a good location.
- Test the icon. Your information should be displayed when you hover over it.
Download Information Icon PDF