Resources for Working Remotely
It is important to maintain an updated antivirus software on your home/personal computer. Antivirus updates contain the latest files needed to combat new viruses and protect your computer. This is an important step for anyone that is accessing the USI network from their home/personal computer. There are many antivirus software options and we don’t provide a standard or best practice suggestion. However, if you are running a newer version of Microsoft Windows (Windows 10, Windows 8.1, or Windows 8), then you’ve already got Windows Defender antivirus built in. If you need assistance with antivirus and your personal computer, please contact the Help Desk via email at it@usi.edu.
Please press here to login for access to Banner/Xtender and/or Cognos.
Please press here to login for access to instructions on installing the USI VPN client.
Please press here to login for access to instructions on mapping drives on a PC.
Blackboard Requests:
Do you need additional individuals added to your Blackboard course(s)?
Send an email to it@usi.edu with the following:
- Course ID, title, section number
- Names of individuals to add to the course(s)
- Type of access requested (i.e., instructor, TA, guest)
Do you need a Blackboard organization site?
An organization site acts as a repository for shared resources that allows multiple faculty to upload documents, links to videos, assignments, tests and pools, etc. that may be shared in your Blackboard courses.
Send an email to it@usi.edu with the following:
- Requested name of the organization site
- Names of individuals to add to the organization site
- Name of individual to identify as leader of the organization site of the organization.
Lab Software/Specialized Software Applications:
Do you need access to any Lab or Specialized Software Applications (MATLAB, SPSS, etc.)?
Send an email to it@usi.edu with the following:
- A list of specialized software packages you need to access.
Panopto Requests:
Have you used Panopto previously for your course and have some saved lectures you would like to post into your current course?
Send an email to it@usi.edu with the following:
- Your current course name and section number
- The previous course and section that currently holds these lecture recordings
- A list of which lectures you need copied into your current course and section
Zoom Requests:
Do you want to use Zoom for lecture capture?
A basic, free Zoom account will be sufficient if your primary need is for recording lectures to link in your Blackboard course. Synchronous usage is limited to 40 minutes.
Do you need a Zoom Pro Account?
If you need a Pro account for synchronous usage greater than 40 minutes, please complete a request (please note, we have a limited number of licenses.)
Once your account is ready, log in to MyUSI and click on the Zoom icon. Note, it will be very easy to convert a basic account to a Pro account if you previously have been using the free Zoom. Resources for Zoom can be found in Faculty Support.
Do you have additional Zoom needs?
Web cameras, headsets with microphones are available for check out at the Rice Library.
Keep in touch and stay productive with your teams using MS Teams and Office 365, while working remotely.
Microsoft Teams Overview:
- With Microsoft Teams on your PC, Mac, or mobile device, you can:
- Pull together a team of coworkers or students
- Utilize the chat feature, rather than email
- Securely edit files at the same time
- See likes, @mentions, and replies with a single tap,
- Customize files by adding notes, websites, and apps
Video Conferencing with Zoom
Zoom is a desktop video conferencing solution perfect for meeting with individuals or groups.
Types of Zoom Accounts:
Basic: A basic user is a free account user who can host up to 40 minutes meetings when there are more than 2 people in the meeting. This can be used for lecture recording and for office hours.
Pro: A pro user is a paid account user who can host unlimited meetings on the public cloud. Can be used for class sessions and meetings.
Getting the Appropriate Account Type:
Downloading the Zoom Client:
1. Visit USI's Zoom website to download the Zoom Client on your computer or mobile device.
For a desktop computer, please follow these instructions:
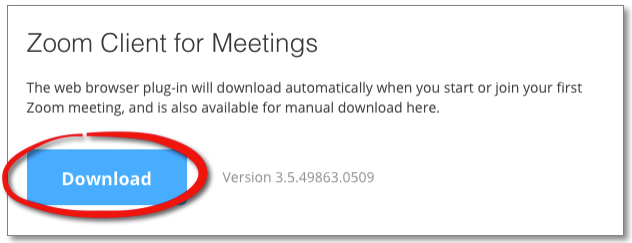
Click the Download button under Zoom Client for Meetings.

The Zoom file will be downloaded automatically. Run the downloaded file to install the app.
Note: if you have trouble finding the downloaded file, please go to the "downloads" folder on your computer, look for the zoominstaller or zoomlauncher file, and run it by double-clicking it.
For mobile devices the process is similar to downloading other apps.
2. Open the Zoom application and click Sign In
3. Sign in with SSO
4. Type USI as the company domain
5. Log in using your myUSI username and password
Logging in to Zoom:
1. Log in to myUSI
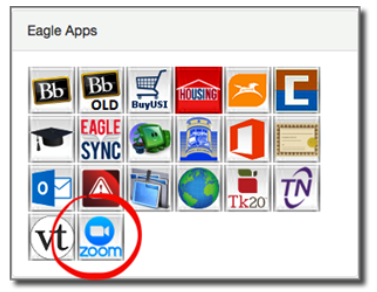
2. Click on the Zoom app icon under Eagles Apps

Joining a Zoom Meeting:
To join a scheduled meeting, you can do ONE of the following options:
a. If the host of the meeting has sent an invitation, then click on the link following the text “Join form PC, Mac, Linux, iOS or Android:” provided in the email or calendar invitation.
OR
b. If the host shared the Meeting ID by another method, then you may join the meeting by logging in to Zoom via myUSI, clicking the Join button and then typing in the Meeting ID.
View the brief Join a Meeting video for more information.
Scheduling a Zoom Meeting:
1. After logging in to Zoom via myUSI with either a Basic or Pro account, you may schedule a Zoom meeting and invite others to the meeting.
2. Please view this brief video Scheduling a Meeting to learn more.
Starting a Scheduled Zoom Meeting:
1. Log in to Zoom via myUSI with either a Basic or Pro account
2. Click on Meetings
3. Select Upcoming Meetings and click on Start button on right for the scheduled meeting.

Using Additional Zoom Features:
Meeting Controls:
Zoom Advanced Settings:
Sharing your Screen:
Recording a Zoom Meeting:
Enabling Closed Captions:
For additional Zoom tutorials, please go to the Zoom Help Center.
1) Download a USI Virtual Background here.
2) View the short video below to learn more about adding a virtual background in Zoom.
- Do not share your meeting link on social media or any public forum – posting it within Teams is fine, that is a protected space, but forward facing media is not private or protected, and anyone can get to that link.
- Avoid using your Personal Meeting ID (PMI) in public events. The PMI is basically one continuous meeting and if someone has access to that, they can join any Zoom session you host. So for your meetings, you might consider using your PMI, but if you are going to post it on a front-facing website, then always choose to “automatically generate” your Meeting ID – this way it is a random number, and not your personal Meeting ID shared publicly.
- Allow only signed-in users to join. Please view the Authentication Profiles for Meetings page.
- When you set up your meeting, if you are only inviting individuals from USI, and not any outside guests, you may choose the option to allow only authenticated users to join. They must sign into Zoom (see screenshot of the meeting settings to check) – this means they must have a registered Zoom account and login to it to join. However, this option is not a good one if you have an outside guest that do not have a USI email account.

- You can lock the meeting; however, if a participant gets “kicked out” (loses connection) during a meeting, once it is locked, they cannot be readmitted.
- You can remove unwanted participants and prevent them from rejoining. You can also use the settings features in the participants list.

- Prevent participants from screen sharing – our default setting in our global Zoom account has been set that the host is the only one who can share. This is a precaution taken to ensure that the host controls screen sharing control.
- It is best to limit this to those whom you know need to share their screen. To do this, the best practice is to make these individuals a co-host (you can have unlimited co-hosts). This way each person that needs screen-sharing capabilities has it and you have full awareness of who has this functionality.
- It is best to limit this to those whom you know need to share their screen. To do this, the best practice is to make these individuals a co-host (you can have unlimited co-hosts). This way each person that needs screen-sharing capabilities has it and you have full awareness of who has this functionality.
- There are two ways to manage who may attend your meetings. You can enable the Waiting Room and/or set a passcode. After September 27, 2020, for security purposes, you MUST have either a Waiting Room enabled or a passcode set.
- By enabling the Waiting Room, you must admit each participant. You can also customize the Waiting Room by choosing to admit participants on a case-by-case basis or admit them all at once.
- As an extra layer of protection you can set a passcode; however, keep in mind that you will need to make sure you remind your meeting participants of the password if one is set. USI has enabled the feature that embeds the passcode into the web link, so that participants can pass right into the session. Anyone with just the meeting ID but no passcode will not be able to join.
Online Learning